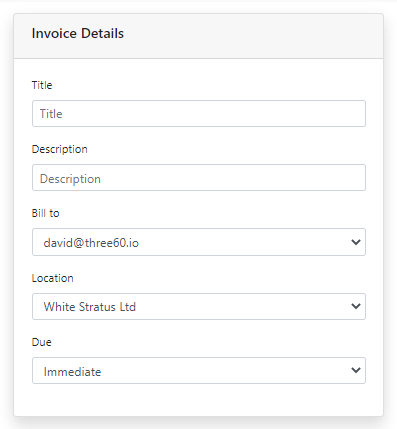
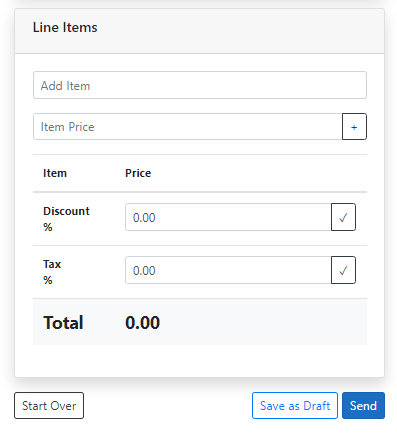
Next, is the invoice line items.
Simply, key in the line item in the Add Item field, provide cost of sales in the Item Price field and click the + button to confirm the line item.
Add multiple line items by repeating the steps above.
Apply a percentage discount value (if required) in the Discount % field and click the tick button to confirm.
Apply a percentage sales tax value (if required) in the Tax % field and click the tick button to confirm.
The total will be automatically calculated and displayed in the Total field.
Once complete, there are three options:
- Start over
- Save as Draft
- Send
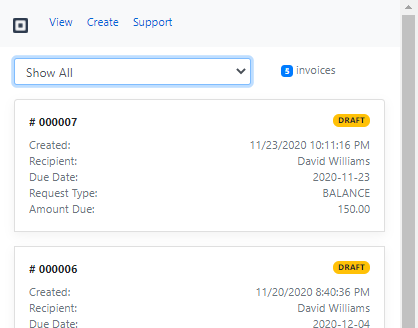
Save as Draft
This is useful when there is a need to quality check any created invoices. For example, the sales team can create and save draft invoices on behalf of their clients, ready for the finance controller to apply any further checks, confirm and send the invoices to the clients directly from the Square platform.
Send
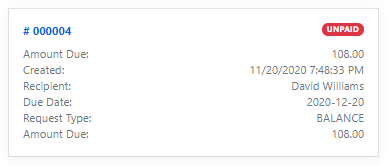
Invoices can be sent instantly to the person using this option. The integration will create an order and send a published invoice via email to the person selected in the Bill to field. To confirm the invoice has been sent, head over to the View section to see the newly created invoice along with the invoice status.